
Overview
Updating contact associations allows vendors to manage which locations a contact can access within the Vendor Portal. Only locations associated with a contact are available for that user to view and manage.
Accessing Contacts
Log in to the Vendor Portal and select Contacts from the left-hand navigation panel under Information.
To open the Update Associations window:
- Use the search bar to locate a contact by First Name, Last Name, or Email Address.
- Click the Pencil icon next to the desired contact.
- Click the Pencil icon beside Associations.

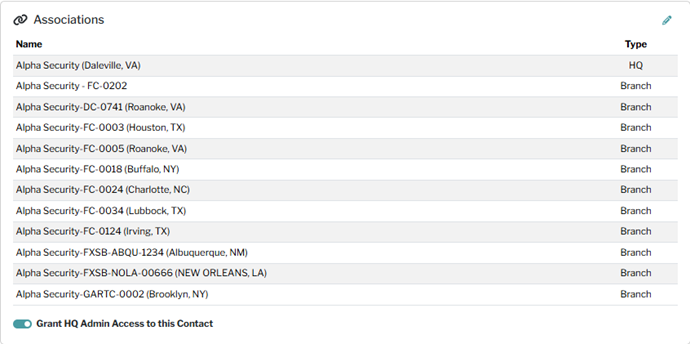
Updating Associations
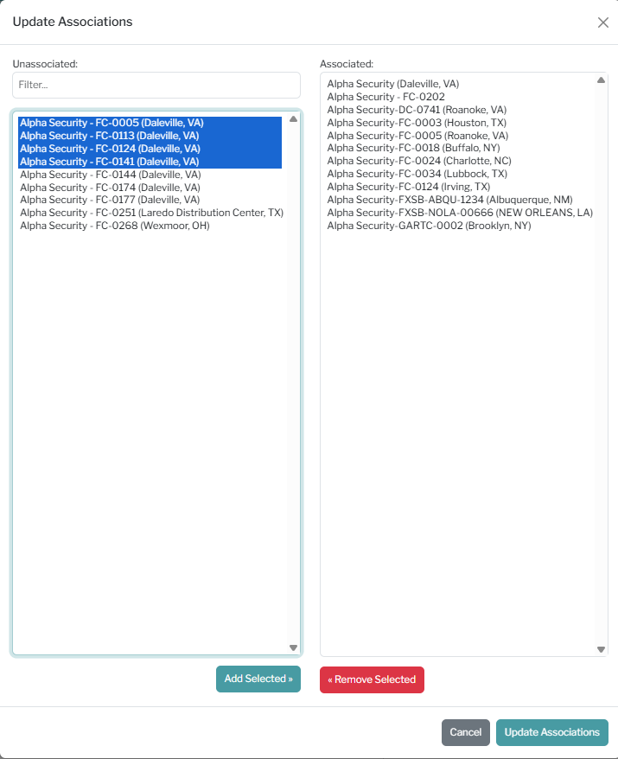
The Update Associations window displays:
- Unassociated Locations on the left.
- Associated Locations on the right.
To associate locations with the contact:
- Select one or more locations from the Unassociated Locations list.
- Use the filter box to search for specific locations, if needed.
- Click Add Selected.
To remove location associations:
- Select one or more locations from the Associated Locations list.
- Click Remove Selected.
After making your changes, click Update Associations to save them.
Was this article helpful?
That’s Great!
Thank you for your feedback
Sorry! We couldn't be helpful
Thank you for your feedback
Feedback sent
We appreciate your effort and will try to fix the article